 Pin to Pinterest
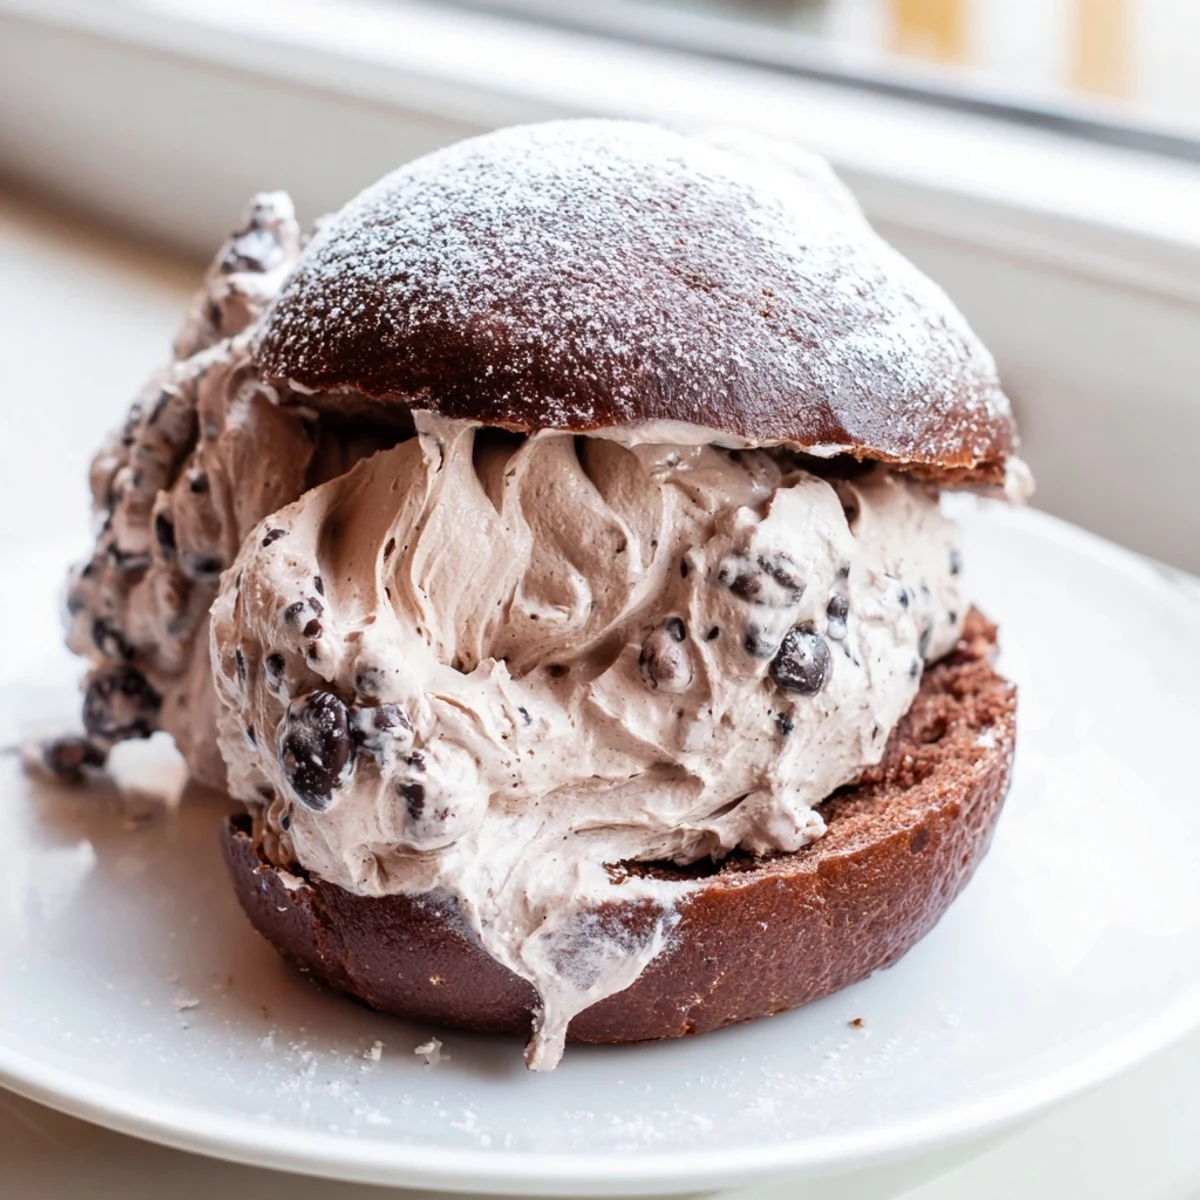
 Italian Chocolate Maritozzi are soft, pillowy sweet buns enriched with cocoa powder and studded with dark chocolate chunks. Originating from Rome, these beloved pastries are traditionally enjoyed at breakfast alongside a cappuccino.
The dough is enriched with butter, egg, and milk, then kneaded until silky and elastic. After a generous rise, the buns are shaped into characteristic ovals, brushed with egg wash, and baked until just set. Once cooled, each bun is sliced and filled with a luscious chocolate whipped cream made from heavy cream, melted dark chocolate, and vanilla.
These buns are best served fresh, dusted with powdered sugar, and paired with your morning espresso for an authentic Roman experience.
Something shifts in your kitchen the moment cocoa powder hits flour and the air turns faintly chocolate before the oven even thinks about turning on. Maritozzi were never on my radar until a rainy afternoon in Trastevere when a baker handed me one wrapped in thin paper and I forgot every other pastry existed. This dark chocolate version is my attempt to chase that feeling at home, and honestly it comes closer than I expected.
I made a double batch for my sisters birthday brunch last spring and watched three grown adults ignore an entire spread of savory food just to hover near the pastry tray. My brother in law ate two before anyone else sat down and then pretended he had no idea what happened to them. The kitchen still smelled like chocolate hours after the last bun vanished.
Ingredients
- All purpose flour (350 g): Regular flour works beautifully here since the cocoa powder carries the structure, so no need to hunt for bread flour.
- Unsweetened cocoa powder (40 g): This is what turns an ordinary sweet bun into something deeply chocolaty without making it heavy.
- Whole milk (120 ml, lukewarm): Warm it just enough to wake up the yeast but not so hot that it kills it, around body temperature is your safest bet.
- Granulated sugar (60 g): Balances the bitterness of the cocoa and feeds the yeast at the same time.
- Active dry yeast (7 g): One standard packet is all you need to give these buns their pillowy lift.
- Large egg (1): Enriches the dough and helps everything bind together into a tender crumb.
- Unsalted butter (40 g, softened): Leave it out on the counter for an hour before starting so it blends in without tearing the dough.
- Vanilla extract (1/2 tsp): A quiet background note that makes the chocolate taste more like itself.
- Salt (1/2 tsp): Do not skip this even though it seems small, it sharpens every other flavor in the bun.
- Dark chocolate (60 g, chopped): Folded in near the end of kneading so you get these little pockets of melted chocolate throughout the crumb.
- Heavy whipping cream (300 ml): Keep this cold straight from the fridge because warm cream will refuse to whip properly.
- Dark chocolate for filling (70 g, melted and cooled): Let it come to room temperature before folding into the cream or it will seize on contact.
- Powdered sugar (30 g): Sweetens the filling just enough without making it cloying.
- Vanilla extract for filling (1 tsp): A full teaspoon this time because the filling needs its own personality.
- Egg yolk (1) and milk (2 tbsp) for brushing: This wash gives the buns that deep golden sheen you see in Italian bakery windows.
Instructions
- Wake up the yeast:
- Stir the yeast and one tablespoon of sugar into the lukewarm milk and set it aside for about ten minutes until the surface looks bubbly and slightly puffed, which means your yeast is alive and ready to work.
- Build the dry base:
- Whisk together the flour, cocoa powder, remaining sugar, and salt in a large bowl until the color is even with no pale streaks hiding in the corners.
- Bring the dough together:
- Make a well in the center, drop in the egg, vanilla, softened butter, and the foamy yeast mixture, then stir with a wooden spoon until you have a shaggy mass that looks like it might be a mess but trust the process.
- Knead with patience:
- Work the dough by hand or with a mixer for eight to ten minutes until it turns smooth and elastic and springs back when you press it with your finger, then knead in the chopped chocolate for the final minute.
- Let it rise:
- Transfer the dough to a clean lightly oiled bowl, cover it with a towel or plastic wrap, and leave it somewhere warm for one to two hours until it has doubled in size and looks like it is ready to burst with confidence.
- Shape the buns:
- Divide the dough into eight equal pieces and roll each one into a plump oval, then arrange them on a parchment lined baking tray with space between them because they will grow.
- Second rise:
- Cover the shaped buns loosely and let them rest for forty minutes until they look visibly puffy and have softened into their final form.
- Preheat and glaze:
- While the oven heats to 180 degrees Celsius, whisk the egg yolk with two tablespoons of milk and brush it gently over each bun so the tops are evenly coated without drips running down the sides.
- Bake:
- Slide the tray into the oven for fifteen to eighteen minutes until the buns feel just firm when you press the top and the kitchen smells like a chocolate shop on a cold morning, then cool them completely on a wire rack.
- Make the filling:
- Whip the cold heavy cream with powdered sugar and vanilla until it holds firm peaks that stand straight when you lift the beaters, then gently fold in the melted cooled chocolate with a spatula until the color is uniform.
- Fill and serve:
- Slice each cooled bun lengthwise leaving one side attached as a hinge, open it like a little book, and pipe or spoon a generous mound of chocolate cream inside, then dust with powdered sugar if you want that bakery window finish.
 Pin to Pinterest
 One Sunday morning I brought a plate of these to a friend who had just moved into a new apartment with nothing but a coffee maker and a folding table. She sat on the floor, took one bite, and said nothing for a full minute, which is the highest compliment I have ever received about anything I have cooked.
The Right Chocolate Makes a Difference
Use a dark chocolate you would actually eat on its own because its flavor is the backbone of both the dough and the filling. I learned this the hard way with a cheap baking bar that tasted like cardboard and ruined an entire batch. Something around sixty to seventy percent cocoa is the sweet spot where you get depth without bitterness taking over.
Handling Enriched Dough Without Frustration
This dough is softer and stickier than a basic bread dough because of the butter, egg, and cocoa, and that is exactly how it should be. Resist the urge to keep adding flour because it will toughen the crumb and leave you with dense buns instead of fluffy ones. Lightly oil your hands while kneading and the dough will cooperate much more willingly.
Serving and Storing Like a Roman Baker
These are best eaten the same day they are assembled because the filling and the bun have a limited window of perfect harmony before the cream starts softening the bread. If you need to plan ahead, bake the buns one day and fill them the next morning for the freshest result.
- Store unfilled buns in an airtight container at room temperature for up to two days.
- Keep the chocolate cream in the fridge and stir gently before using if it has been sitting.
- Assembled maritozzi should be eaten within four hours or the texture starts to suffer.
 Pin to Pinterest
 These chocolate maritozzi are a small act of love wrapped in cocoa scented dough and you deserve to make them at least once. Serve them with a strong espresso and watch the room go quiet.
Recipe FAQs
- → Can I make the dough ahead of time?
-
Yes, you can prepare the dough through the first rise, then refrigerate it overnight. Let it come to room temperature for about 30 minutes before shaping and proceeding with the second rise.
- → Why did my maritozzi turn out dense?
-
Dense buns usually result from under-kneading or insufficient rising time. Ensure you knead the dough for a full 8-10 minutes until smooth and elastic, and allow both rises to complete fully until the dough has visibly doubled.
- → Can I use milk chocolate instead of dark chocolate?
-
Absolutely. Milk chocolate will give the filling and dough a sweeter, milder flavor. Reduce the powdered sugar slightly in the filling if using milk chocolate to balance the sweetness.
- → How should I store leftover maritozzi?
-
Store filled maritozzi in the refrigerator for up to 2 days, though they are best enjoyed the same day. Unfilled buns can be kept in an airtight container at room temperature for up to 3 days.
- → Can I freeze the baked buns?
-
Yes, freeze the baked buns without filling for up to 1 month. Thaw at room temperature, then warm briefly in the oven before filling with freshly made chocolate whipped cream.
- → What type of cocoa powder works best?
-
Unsweetened natural cocoa powder gives the best results for both flavor and color. Dutch-processed cocoa will also work but produces a milder, less intense chocolate flavor in the dough.