 Pin to Pinterest
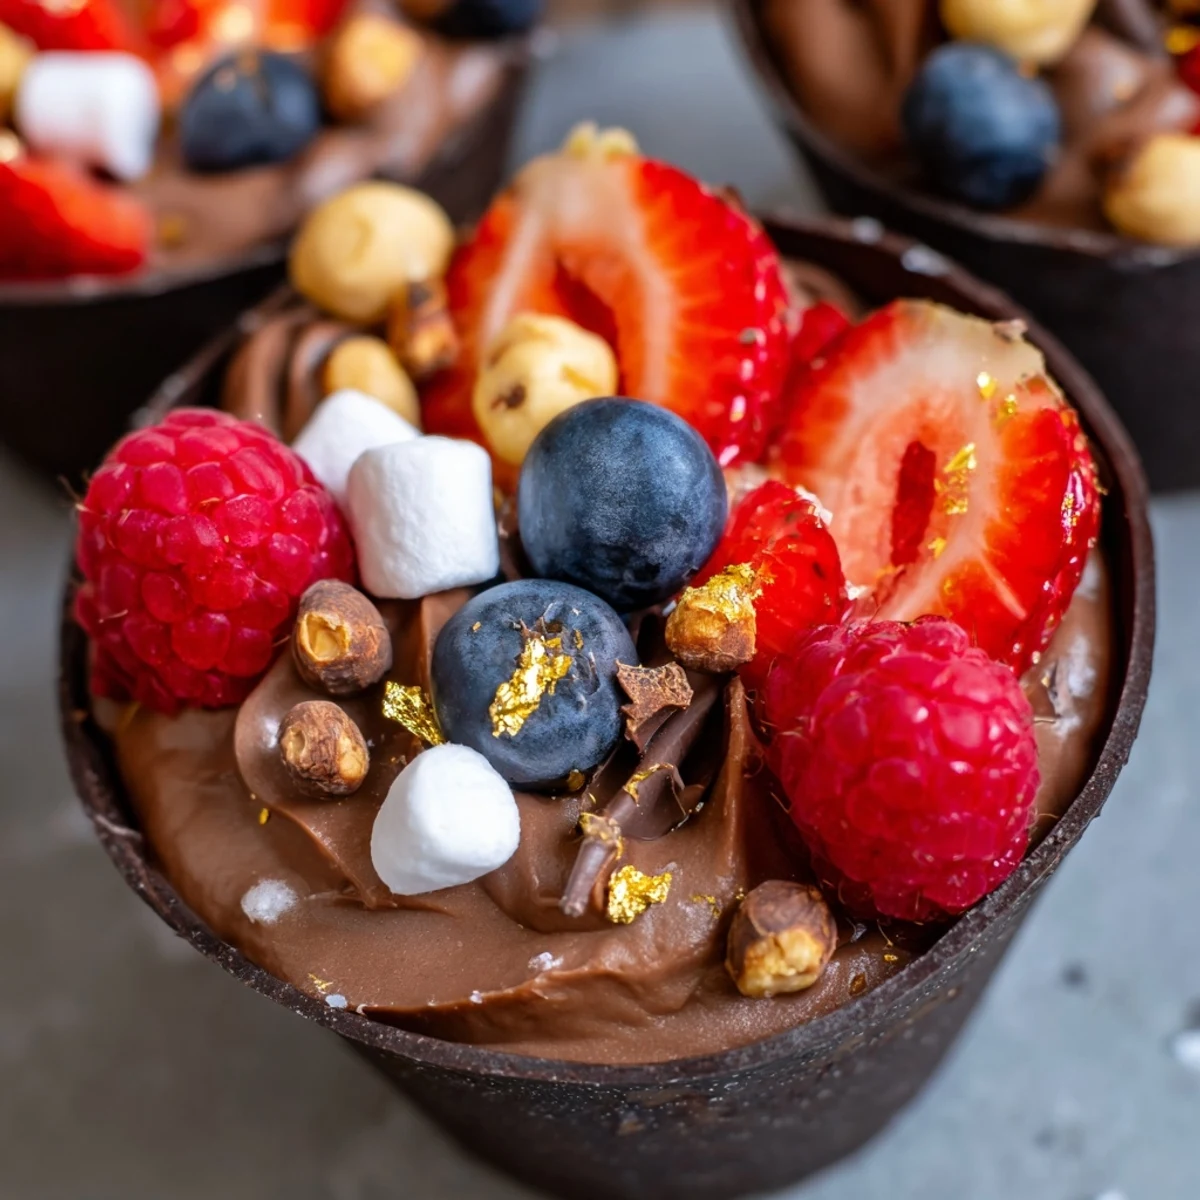
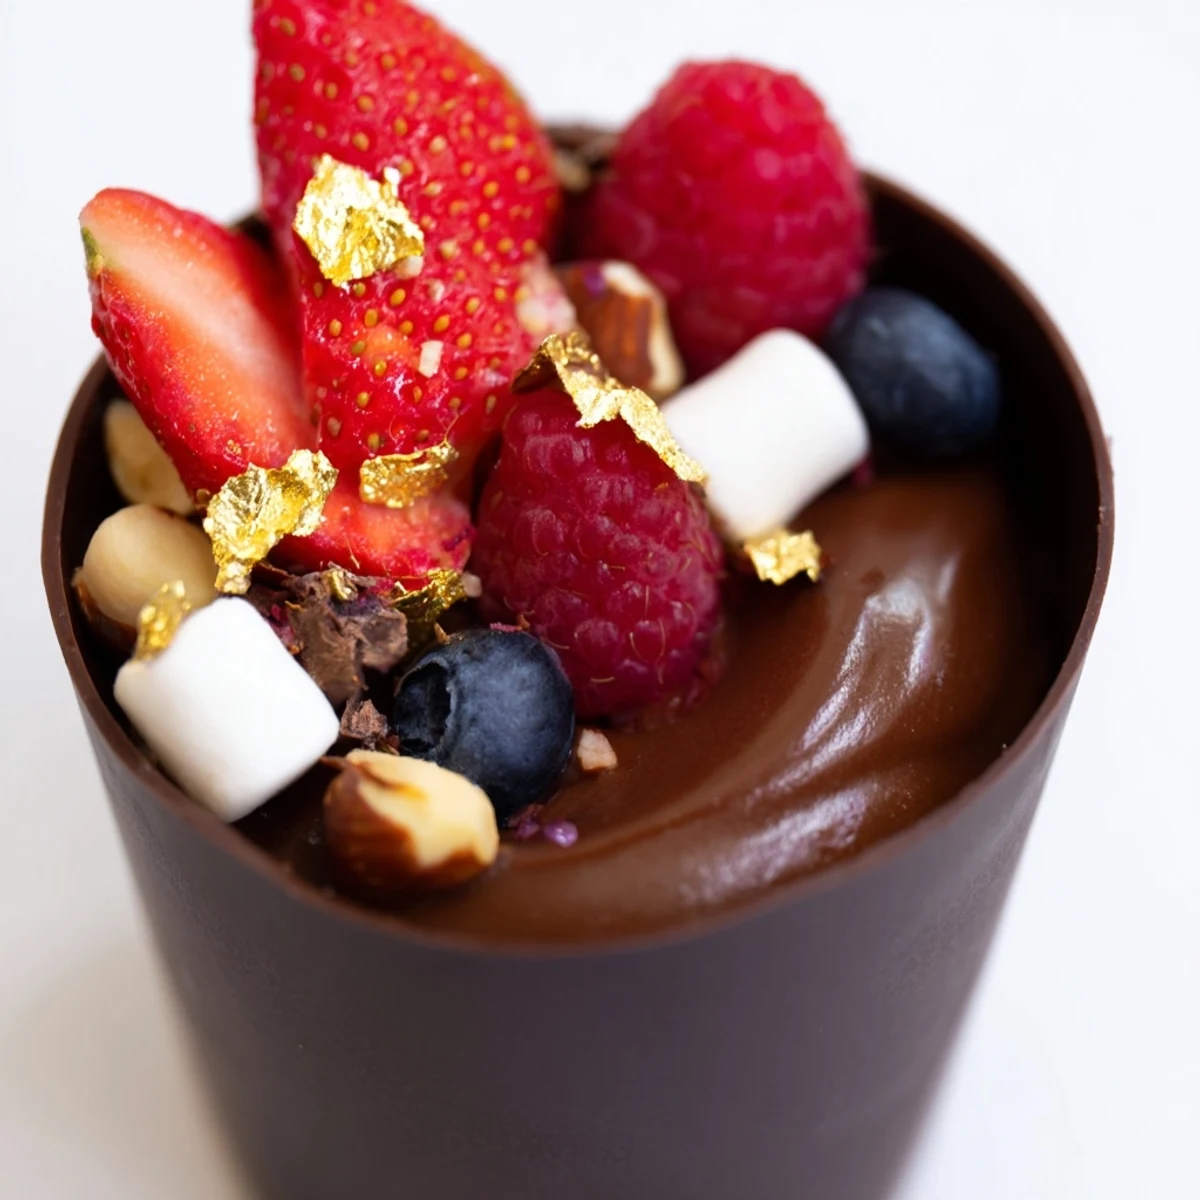
 These elegant chocolate grazing cups feature handmade dark chocolate vessels filled with silky chocolate mousse. Each cup is generously topped with fresh mixed berries, crunchy chopped nuts, mini marshmallows, and chocolate curls. The combination of velvety mousse, crisp chocolate shell, and vibrant toppings creates a sophisticated dessert experience.
Perfect for entertaining, these individual portions allow guests to graze through various flavors and textures. The contrast between the bittersweet chocolate, tart berries, and nutty crunch offers a balanced sweetness that feels indulgent without being overwhelming.
Assembly takes just 35 minutes active time, with chilling ensuring the chocolate sets properly and mousse achieves ideal fluffy consistency. These handheld desserts elevate any gathering while remaining surprisingly simple to prepare.
The first time I made these chocolate cups, my kitchen counter looked like a crime scene of cocoa dust and scattered berries. My roommate wandered in, eyeing the suspicious chocolate shells with genuine curiosity, then proceeded to eat three before I could even assemble the final display. That's when I knew this recipe was dangerous in the best possible way.
I served these at my birthday dinner last year, and people literally gasped when I brought out the platter. My friend Sarah, who claims she does not even like dessert, went back for seconds and asked if I could make them for her wedding. The edible gold leaf might seem excessive until you see how candlelight catches on those little specks and suddenly understand why fancy restaurants use it.
Ingredients
- 200 g dark chocolate (60% cocoa), chopped: Higher cocoa percentage gives your cups better structure and that sophisticated bittersweet balance that cuts through the sweet toppings
- 200 ml heavy cream: Cold straight from the fridge is nonnegotiable here, and I learned the hard way that even slightly warm cream will not whip properly no matter how long you stand there whisking
- 100 g dark chocolate, chopped: This goes into your mousse, and letting it cool slightly after melting prevents it from seizing when you fold in the whipped cream
- 2 tbsp powdered sugar: I tried using granulated sugar once and ended up with a grainy mousse that nobody wanted to finish, so do not make my mistake
- 1 tsp vanilla extract: Pure vanilla makes such a difference here that it is worth the extra expense, especially since this recipe has so few ingredients
- 1 cup fresh mixed berries: Use whatever looks best at the market, but I find raspberries and strawberries give the most beautiful color contrast against the dark chocolate
- 2 tbsp chopped nuts: Toast them lightly in a dry pan for 2 minutes first and thank me later when that subtle warmth comes through in every bite
- 2 tbsp mini marshmallows: These are purely for nostalgia and texture, plus they catch the light so prettily on a dessert table
- 2 tbsp chocolate curls: Use a vegetable peeler on a room temperature chocolate bar to make these, and do not stress if they break into smaller shards
- 1 tbsp edible gold leaf: Completely optional but absolutely transforms these from homemade dessert into something you would see at a high end event
Instructions
- Craft your chocolate cups:
- Melt your chocolate in 30 second bursts, stirring between each, until it pours like warm honey. Paint the inside of each cupcake liner with a generous layer, working quickly before the chocolate starts to set, then pop the tray in the fridge for 20 minutes until they are firm to the touch.
- Unmold the chocolate shells:
- Peel away the liners slowly, starting from the top edge, and do not panic if a couple crack your first time. Set the cups aside on a chilled plate while you make the mousse filling.
- Whip the cream base:
- Chill your mixing bowl for 10 minutes while you melt the second amount of chocolate, then whip the cream until soft peaks barely hold their shape. The trick is stopping before it becomes butter because the texture matters so much in a mousse.
- Combine into mousse:
- Stir a dollop of whipped cream into your melted chocolate to lighten it, then gently fold the chocolate mixture back into the remaining cream. Use a spatula and keep your movements light and patient to preserve all that air you just whipped into the cream.
- Fill and decorate:
- Pipe or spoon the mousse into each chocolate cup until they are about two thirds full, then artfully arrange your berries, nuts, and toppings on top. The gold leaf goes on last using tweezers or slightly damp fingertips, and try not to touch it more than necessary.
- Final chilling:
- Refrigerate the assembled cups for at least 20 minutes to let the mousse set up properly. This also allows the chocolate cup and mousse flavors to meld together into something cohesive rather than tasting like two separate elements.
 Pin to Pinterest
 My grandmother always said the difference between home cooking and professional desserts is patience, and these cups taught me exactly what she meant. The time you spend getting the chocolate shell just right, waiting for cream to reach perfect soft peaks, arranging each berry with care, that is what transforms simple ingredients into something people will remember months later.
Making Them Ahead
You can make the chocolate cups up to 3 days in advance if you store them between layers of parchment paper in an airtight container. I learned to keep them in the coolest part of the fridge because the chocolate can develop those weird white streaks if the temperature fluctuates too much. The mousse is best made the same day though since it loses some of that signature lightness after sitting overnight.
Flavor Variations
White chocolate cups with a dark chocolate mousse create the most gorgeous visual contrast that photographs absolutely beautifully. For coffee lovers, dissolve instant espresso in a teaspoon of warm water and fold it into your mousse, or add orange liqueur like the recipe suggests for an adults only version that tastes like a chocolate orange in fancy dessert form. Milk chocolate works beautifully for kids or anyone who finds dark chocolate too intense, just reduce the powdered sugar slightly since milk chocolate is already sweeter.
Presentation Secrets
Serve these on a white platter or marble slab because the contrast makes every element pop in photos. I arrange mine in a slight curve rather than a straight line, which feels more organic and elegant. Lighting matters so much for the gold leaf, so if you are serving at a dinner party, try to position the dessert table near a window or soft lamp. Fresh mint leaves tucked between the cups add a burst of green that makes the whole presentation feel more balanced.
- Use tweezers for placing the gold leaf because your fingers will leave fingerprints that show up in photographs
- If you run out of chocolate curls, grate some chocolate over the tops for a similar effect that looks intentionally rustic
- Keep these chilled right up until serving time because the mousse softens quickly at room temperature
 Pin to Pinterest
 There is something deeply satisfying about making dessert components from scratch that look impressive enough for a restaurant menu. These chocolate cups have become my go-to for moments when I want to make someone feel special without spending the entire day in the kitchen.
Recipe FAQs
- → How far in advance can I make these chocolate cups?
-
The chocolate cups can be prepared up to 2 days ahead and stored in an airtight container at cool room temperature. For optimal freshness, assemble with mousse and toppings the same day of serving to prevent the chocolate from softening or the toppings from becoming soggy.
- → Can I use different types of chocolate for the cups?
-
Absolutely. While dark chocolate provides a rich contrast to the sweet mousse, milk chocolate creates a sweeter profile that appeals to many palates. White chocolate cups offer elegant visual appeal but may be more delicate to handle due to their lower melting point.
- → What if I don't have silicone cupcake liners?
-
Paper liners work well and can be carefully peeled away once the chocolate sets. Alternatively, use small silicone molds or even clean plastic containers with rounded bottoms. The key is ensuring the surface is smooth and flexible enough to release without cracking the chocolate.
- → How do I prevent the chocolate from seizing when melting?
-
Melt chocolate slowly using 30-second intervals in the microwave, stirring between each. Ensure no water or steam comes into contact with the chocolate, as even a few drops can cause seizing. If melting over a double boiler, keep the water at a gentle simmer, not boiling.
- → Can I make these without heavy cream?
-
Coconut cream whips beautifully as a dairy-free alternative, though it will add subtle coconut flavor. For a lighter version, fold stabilized whipped cream or use a combination of Greek yogurt and whipped cream for a tangier mousse variation.