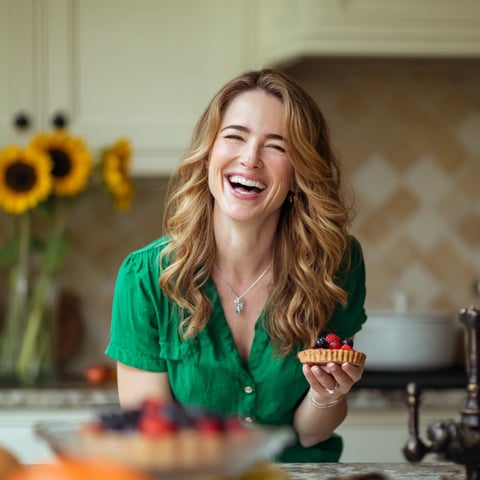
 Pin to Pinterest
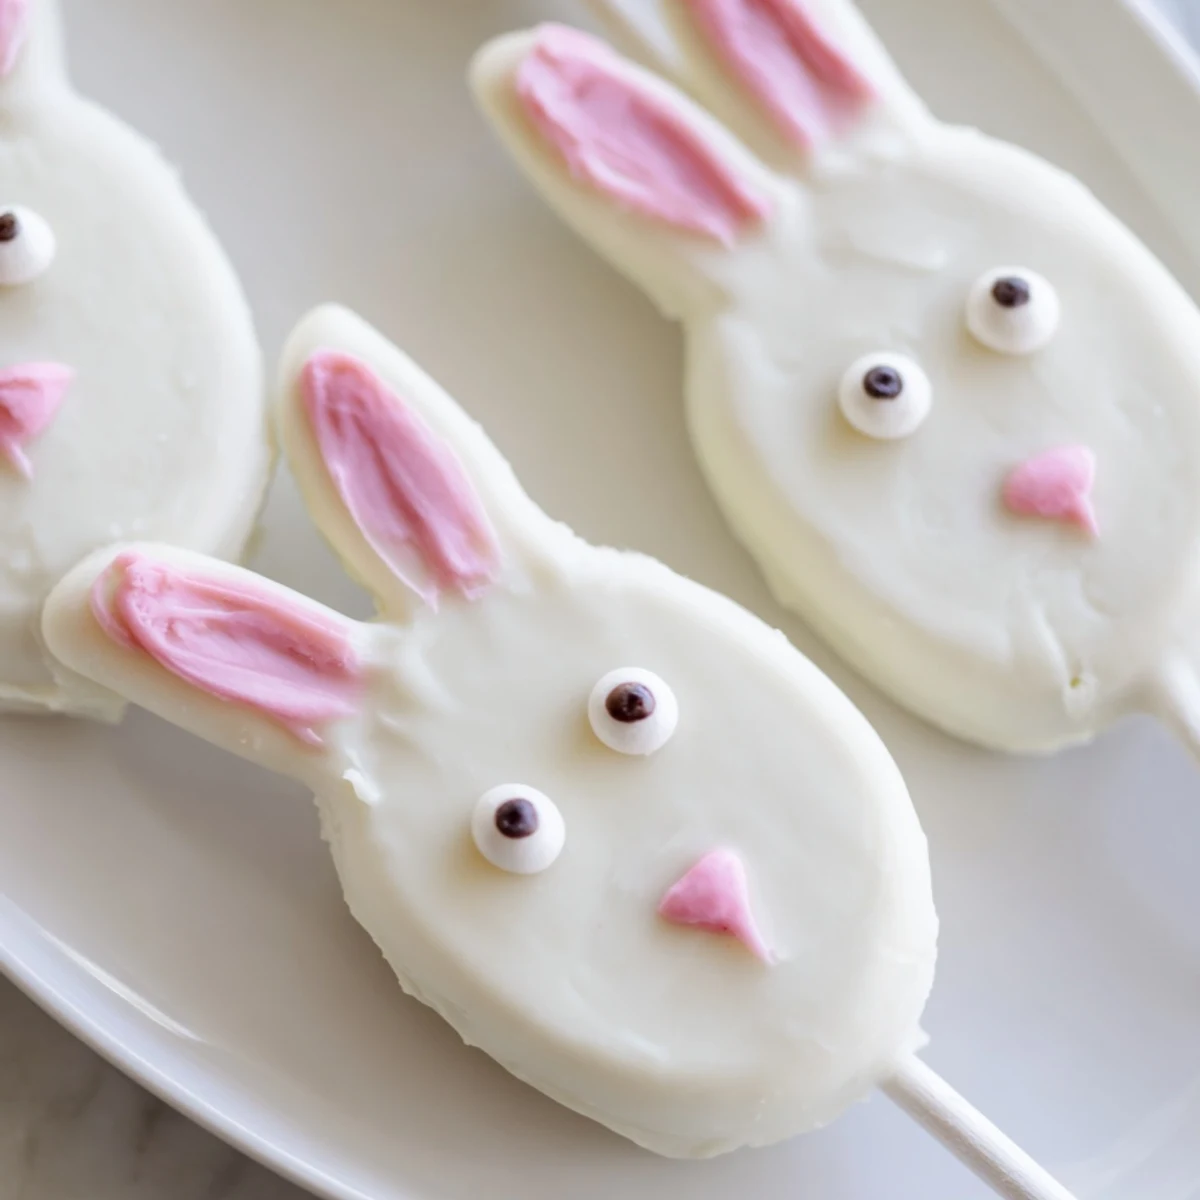
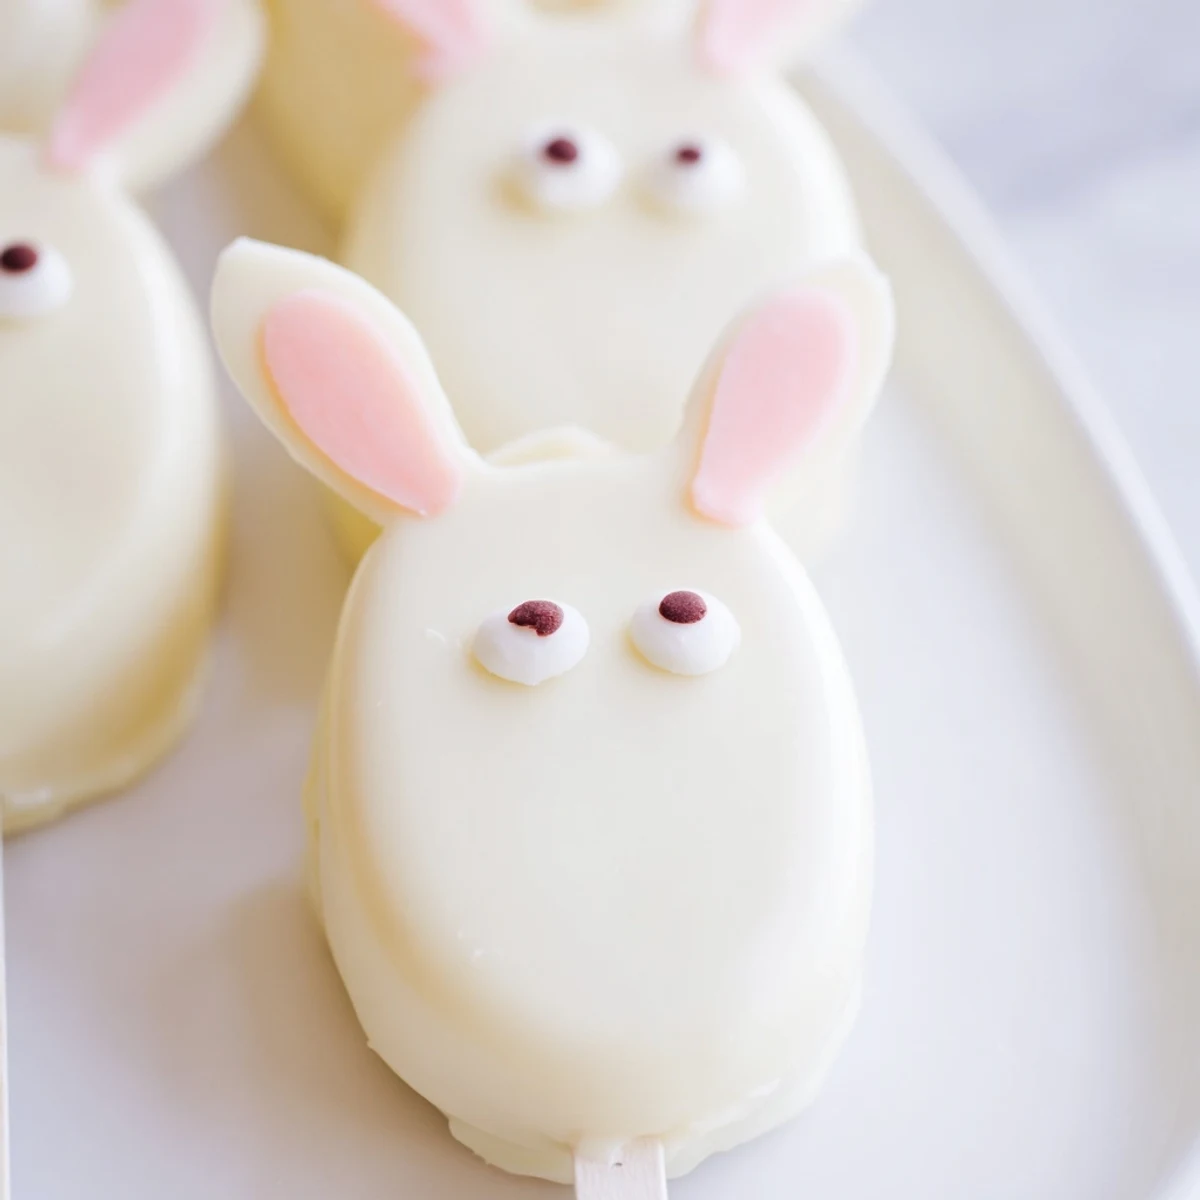
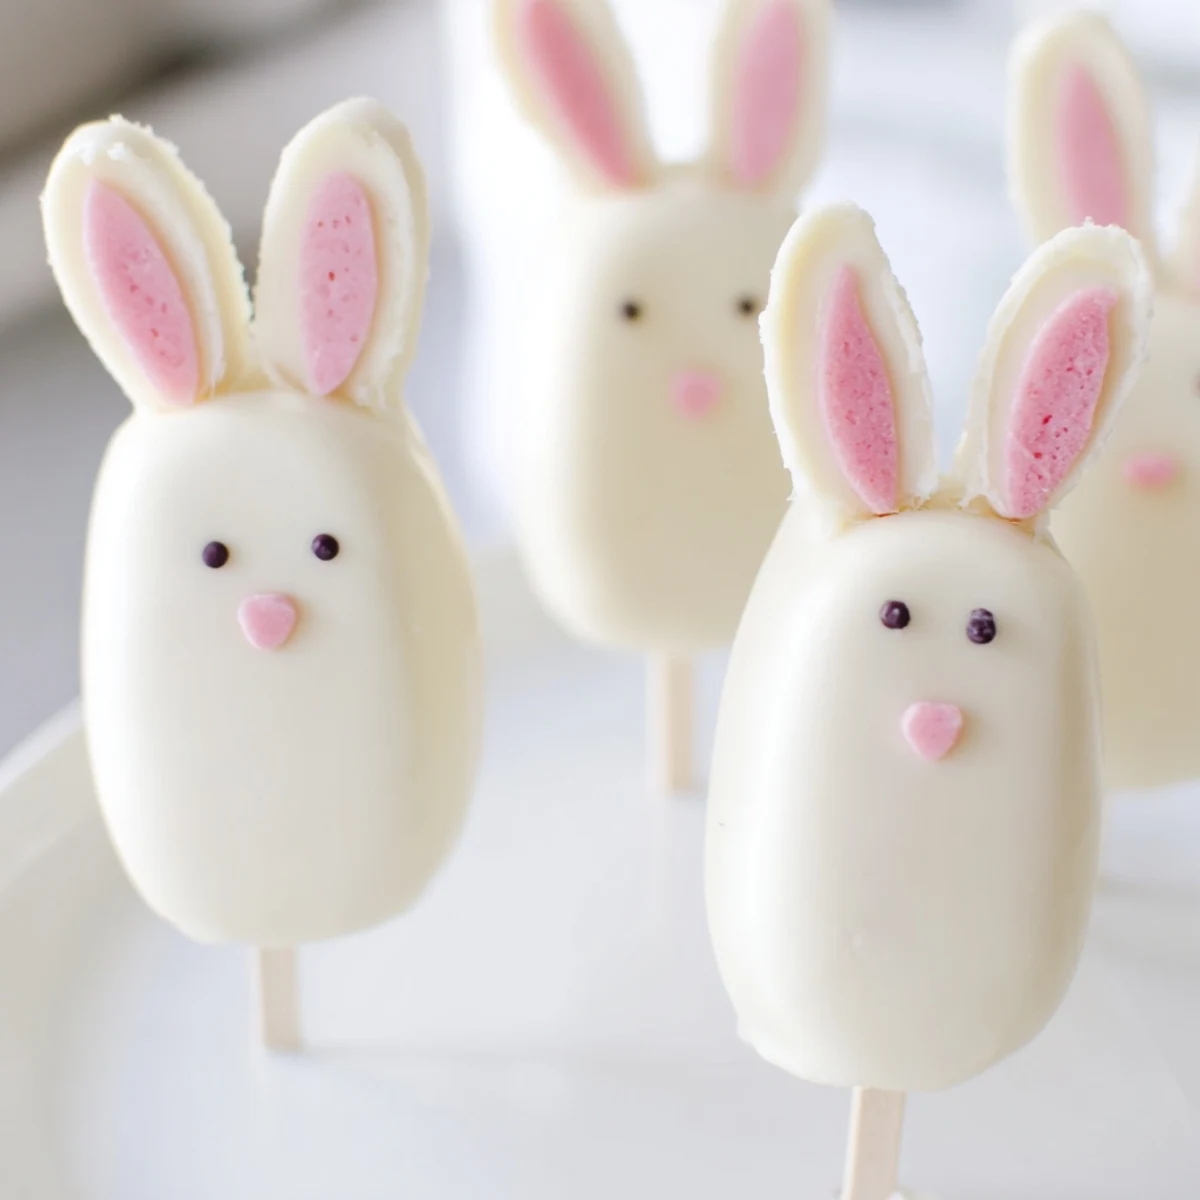
 These delightful bunny-shaped treats combine moist vanilla cake with a rich white chocolate coating, creating the perfect festive dessert for your Easter gathering. The cake mixture blends vanilla crumbs with cream cheese and butter for a fudgy texture that holds its shape beautifully when dipped.
Making these treats is straightforward: mix the cake dough, shape into bunny faces, insert sticks, and chill before coating in melted white chocolate. Decorate with candy eyes, sprinkles, or fondant details to bring each bunny to life. The result is an adorable handheld dessert that kids and adults will love.
Customize with different cake flavors like chocolate or lemon, swirl food coloring into the coating, or use various decorations to match your Easter theme. Store in the refrigerator for up to three days.
Last Easter, my niece asked if we could make something that would make the Easter bunny jealous. We stood in my kitchen covered in white chocolate smudges, realizing these bunny cakesicles were about to become legendary. The way her eyes lit up when she pulled the first one from the fridge was absolutely priceless.
I made these for my daughters classroom party and suddenly every parent was texting me for the recipe. Theres something magical about watching kids carefully choose their bunny, comparing ear designs like they were selecting fine art. One mother confessed she hid two in her purse to take home because she couldnt stop thinking about them.
Ingredients
- 1 cup vanilla cake crumbs: I use leftover cupcakes or a store-bought vanilla cake crumbled into fine pieces
- 2 tbsp cream cheese: This creates that perfect creamy binding that holds everything together beautifully
- 1 tbsp unsalted butter: Room temperature butter helps the mixture come together like magic
- 2 tbsp powdered sugar: Just enough sweetness to make the cake center irresistible
- 1/2 tsp vanilla extract: Pure vanilla extract makes all the difference in the flavor profile
- 10 oz white chocolate: High quality white chocolate melts smoother and tastes infinitely better
- Edible gel food coloring: Pink and yellow work perfectly for those cute bunny details
- 8 cakesicle sticks: Make sure theyre food safe and sturdy enough to hold the weight
Instructions
- Mix your cake mixture:
- Combine cake crumbs, cream cheese, butter, powdered sugar, and vanilla in a medium bowl until it forms a dough that holds together when squeezed
- Shape the bunny faces:
- Divide into 8 equal portions and form each into a flattened oval shape with slightly pointed ears on top
- Add the sticks:
- Gently press a cakesicle stick into each shape about halfway through, then refrigerate for 20-30 minutes until firm
- Melt the chocolate:
- Heat white chocolate in 30-second intervals, stirring between each burst until completely smooth and glossy
- Coat the bunnies:
- Dip each cake pop into the melted chocolate, tap gently to remove excess, and immediately place on parchment paper
- Decorate while wet:
- Add candy eyes, sprinkles, or fondant features right after dipping so everything sticks perfectly
- Set and serve:
- Let them harden at room temperature or pop in the fridge briefly, then serve these adorable Easter treats
 Pin to Pinterest
 These little treats have become such a tradition that my family starts asking about them weeks before Easter. Last year, my dad admitted he secretly ate two for breakfast before anyone else woke up. Theres something about the combination of nostalgic cake pop flavors and festive bunny shapes that brings out the kid in everyone.
Making Them Ahead
Ive learned through trial and error that these freeze beautifully before the chocolate coating. Shape and chill the cake centers, then freeze them in a single layer. When youre ready, let them thaw slightly in the refrigerator before dipping. This makes Easter morning prep absolutely stress free and lets you focus on the fun decorating part.
Perfect Chocolate Temperature
The secret to that gorgeous smooth coating is working with chocolate thats around 90 degrees Fahrenheit. Too hot and it slides right off the cake centers, too cool and you get thick, clunky coating. I use a kitchen thermometer now after one particularly disastrous batch where my bunnies looked like they were wearing chunky sweaters.
Decoration Ideas That Shine
Some of my favorite creations have used unexpected decorations like crushed edible flowers for a spring garden look, or drizzled milk chocolate over the white coating for a marbled effect. Kids absolutely love choosing their own decoration station setup with bowls of sprinkles and candies.
- Keep fondant decorations thin so they dont weigh down the chocolate coating
- Work quickly once the chocolate is dipped because it sets fast
- Have all decorations ready before you start dipping anything
 Pin to Pinterest
 These bunny cakesicles bring such joy to Easter celebrations, and I hope they become a beloved tradition in your home too. Happy Easter and happy baking.
Recipe FAQs
- → What are cakesicles?
-
Cakesicles are handheld treats made by mixing cake crumbs with frosting to form a dough, which is then shaped around a stick and coated in melted chocolate. They combine the texture of cake truffles with the fun presentation of a popsicle.
- → Can I make these ahead of time?
-
Yes, prepare the treats up to 3 days in advance. Store in an airtight container in the refrigerator. The coating may develop condensation when removed from cold storage, so bring to room temperature before serving for the best appearance.
- → Do I need a special mold?
-
A cakesicle mold helps create uniform shapes but is not required. You can hand-shape the mixture into flattened ovals or bunny faces using your hands or a small cookie cutter. The key is achieving a shape that holds securely on the stick.
- → What other cake flavors work well?
-
Chocolate cake creates a classic contrast with white chocolate coating. Lemon or strawberry cake adds bright fruity notes. Red velvet offers a striking color peeking through the coating. Use any leftover cake or cupcakes you have on hand.
- → How do I prevent the sticks from falling out?
-
Ensure the cake mixture is chilled and firm before inserting sticks. Dip the tip of each stick in melted chocolate before inserting into the cake dough—the chocolate acts as glue once it hardens. Refrigerate again after shaping to help everything set before dipping.
- → What if my coating is too thick?
-
Add 1 teaspoon of coconut oil or vegetable shortening to the melted chocolate and stir thoroughly. This thins the coating without affecting flavor. For candy melts, a few drops of vegetable oil works well. The coating should flow smoothly but still coat thickly.